Installing the board
Unfortunately, I have a lot of contract work to do right now and don't have much time to spend on the Zipit. I really would like to do a whole photo shoot of installing the board to show you how it is done, but I haven't the time right now.Instead, let me give you some details of how it is done...
1. Remove the battery.
2. Get some stiff plastic sheeting, the anti-static bag material is very good for this. You will need a peice approximately 1" x 2".
3. Using an Xacto knife, "spear" the four plastic "feet" and pry them off, then tack them onto the plastic sheet.
4. Remove the four case philips head screws attaching the bottom of the case.
5. Gently open the case to avoid pulling the speaker wires loose. When the case is open, use the Xacto knife to pry the speaker loose from the case bottom. Tack the speaker onto the plastic sheet to protect the adhesive from dirt.
6. On the bottom half of the case is a flat post located opposite the side where the speaker is. You must remove this post as it will interfere with the new board. I use needle nose pliers to remove it then I remove the excess with an Xacto. Set the bottom of the case aside for now.
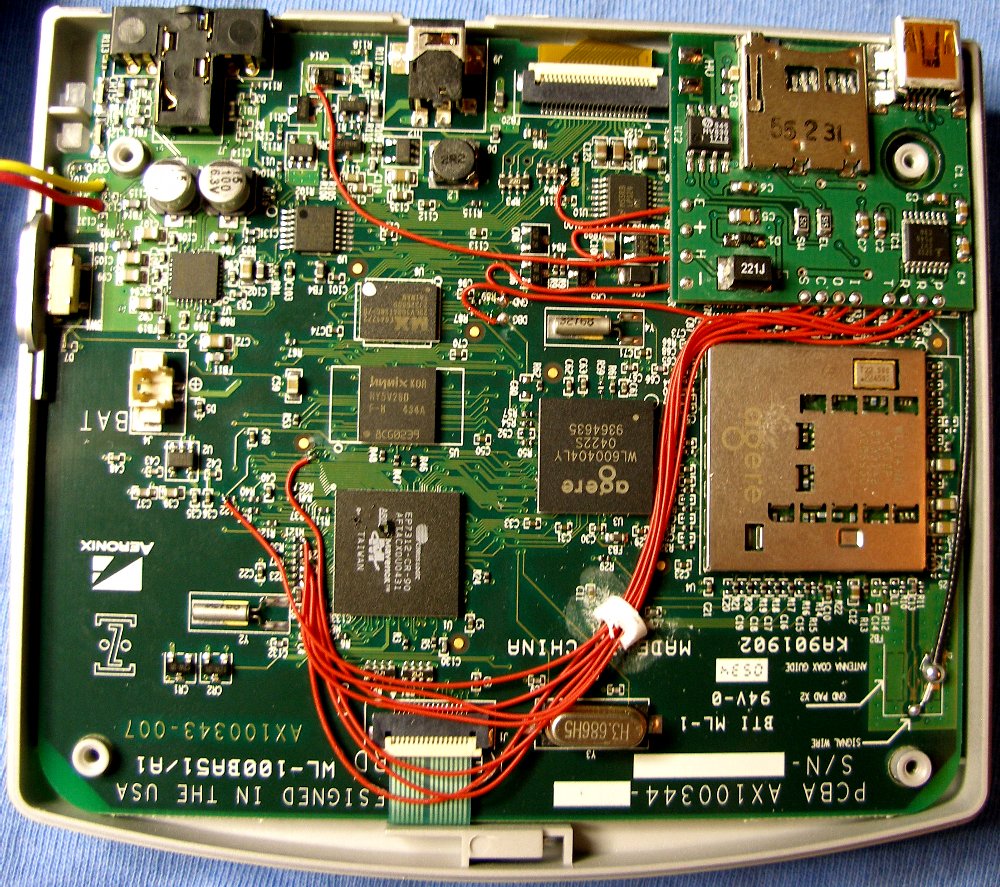
7. Prepare the board by measuring and soldering on the 30ga. wires to their pads of the Addon board (not to the Zipit, yet). You must refer to the schematic as it has the wire lengths listed in the notes. Also refer to the zoomed picture (Zoom on the above menu) of a completed wiring.
8. Using a file, or a sharp pair of micro-shears, ensure that the corner of the Addon board nearest the connector is beveled slightly so that the board fits snugly into the illustrated area of the top cover.
9. At this time, lay the Addon board into position, then mark where the edges of the connector are onto the thin lip of the top case half. This lip will now need to be trimmed off to ensure that the connector fits properly without interference when the case is closed.
10. Now, attach a large square of double-sided foam tape to the underside of the board. Do not cover the round hole and leave about 1/8" clearance from the edges of the board. Press the Addon board onto the main zipit board. Ensure that the Addon board is flush on both sides with the top half of the case sides. Again, refer to the Board Zoom to see how it should be postioned. Note that the section of the thin lip you cut out now straddles the connector? Good.
11. Referring to the schematic, Board Zoom photo and AiboPet's photo wire the Addon board to the mainboard. Carefully note where to put the 'H' connection to CR14, it is the 'outer' side.
12. Once all the wiring is done, assemble the top and bottom halves of the case. Make sure that the front screw posts are mated, then mark where you will cut the notches in the bottom half of the case for the connector and SD card to peek out. I use the Xacto to make the marks on the top edge of the case, make them deep as you may not recognize their location later.
13. Remove the bottom half of the case. You will have to make two notches now. I make the notch for the SD card is 0.100" deep, and the one for the connector is 0.200" deep (from the edge). For this, I use a metal nibbler which not only works great on plastic, but has a 0.100" cutting depth. You may have to use a file to carefully make these notches? Go slowly, this is a cosmetic operation and any mistakes will be ones you will regret (sloppy looking work).
14. Once the slots have been cut, peel speaker off the plastic sheet, carefully! There is a paper gasket on the face of the speaker which holds adhesive and it may tear off! Install the speaker back into the case and run the wires between the two cylindrical capacitors behind the earphone jack. Assemble the two halves of the case.
To test the installation, I install the buildroot zipit image (found elsewhere on this site). If the Zipit can now be re-flashed, and it prints out the Linux startup messages, then I know that the RS232 connector is ok. To test the MMC card (SD card), I login as root, insert a card, then: rmmod mmc; insmod mmc; mount /mmc. I should now see the mmc card when I do a 'mount'.
That is it, sorry about not having the time to take all those photos.